 |
| Her version |
This is the piece that first caught my eye on Pinterest. It looked so simple that I didn't even have to read Spearmint Baby's tutorial to make mine.
Items needed: 1 canvas, a decorative piece of scrapbook paper, 2 to 3 paint colors, a wooden initial, and a paint pen (optional), craft glue or Mod Podge, painters tape or masking tape.
First off, you want to pick a canvas size that works for the room you'll be hanging your art in. I make so many paintings I buy mine in bulk. You can get a 5 pack in several different sizes at Michaels for $19.99 and if they're having a sale, for $14.99. Check for coupons too at www.Michaels.com. Next, you want to select a piece of scrapbook paper that matches your room. There's a thin kind and a thick kind. I suggest going with the thick. And finally, head to the wood section of your local craft store and pick your favorite initial. Michaels has them in big, little, white, black, unpainted, cursive, you name it they have it. I went with the unpainted letters because they're cheaper. I already had the paint, the tape, and the Tacky Glue at home (I prefer this kind over Mod Podge for this project.)
 Now that you got your supplies, you're ready to start. First, you want to tape off your canvas with your painter's or masking tape. I went down about 3/4 of the way. The painter's tape is exactly the right size you'll want for your stripe. Now you can either paint the entire canvas like I did in my Leighton painting leaving the stripe white, or you can leave the upper half of it white, paint the other half and then once it dries, retape and paint your stripe. It's completely up to you.
  Next, take your scrapbook paper and trace a circle on it using something in your house. I used a Tupperware lid, but a bowl would work. Once you got your circle, cut it out. Now it's time to glue it to your canvas. *Tip- use a paint brush to spread it on super thin. Make sure you get the glue all along the edges of the circle so they don't peel up.
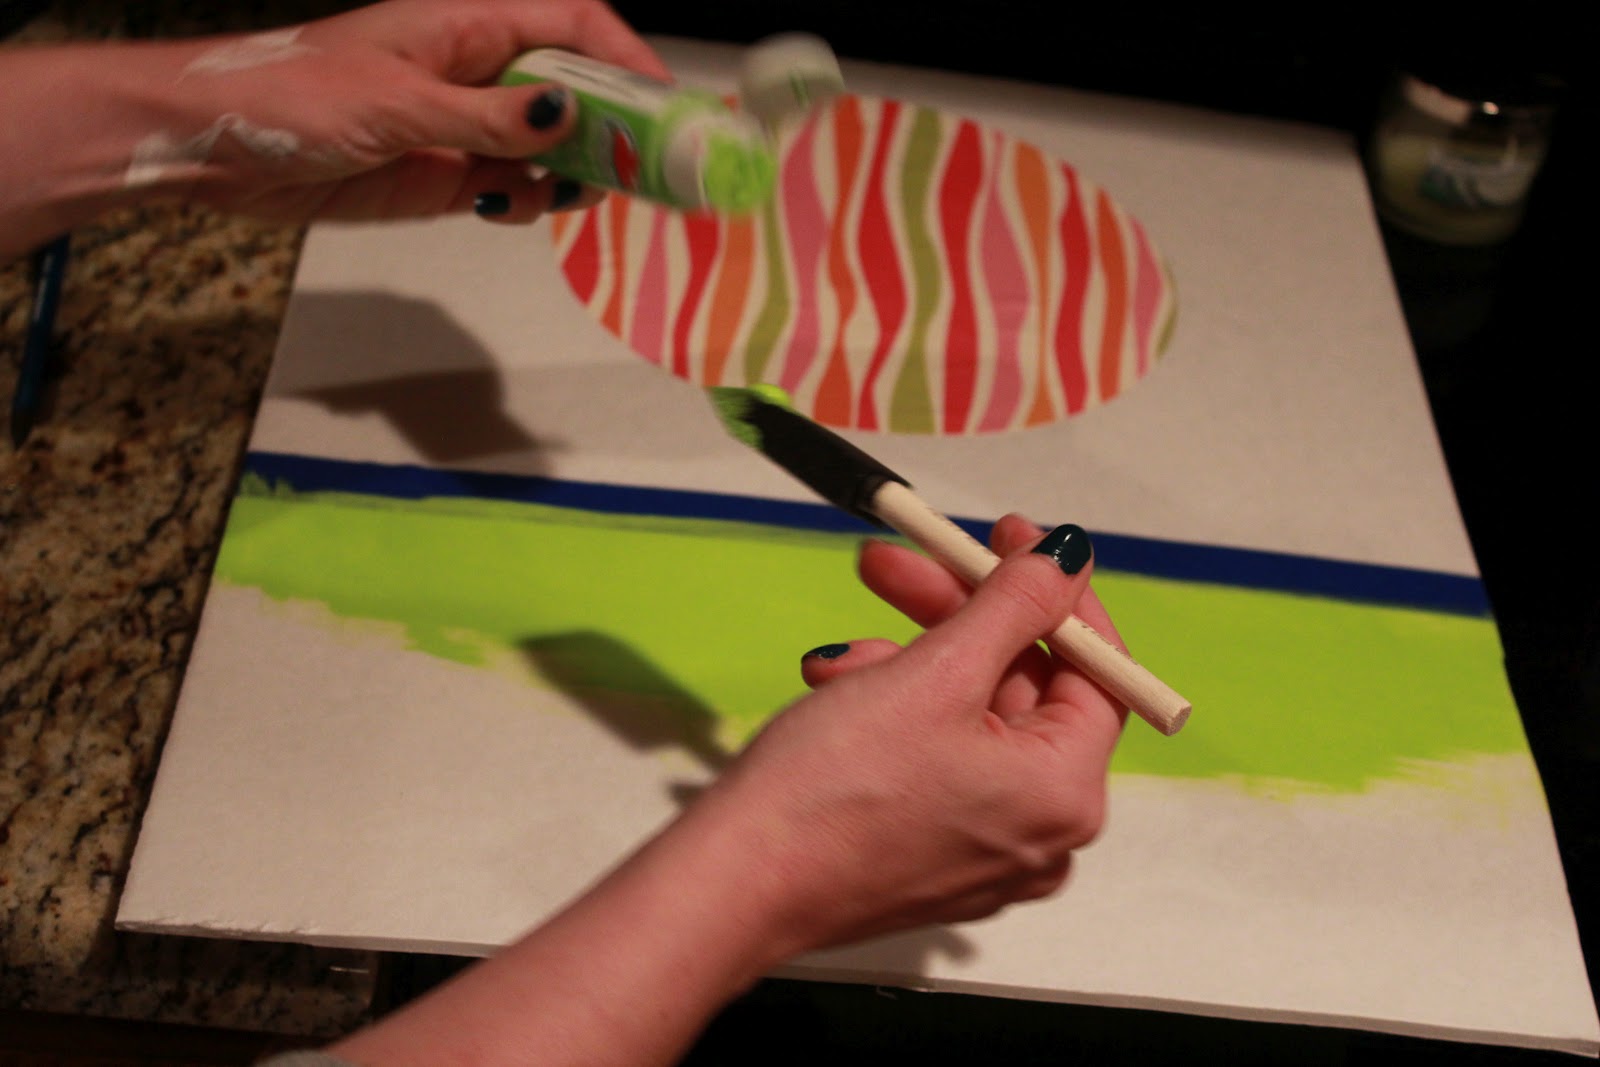
Once you got your circle glued down it's time to paint. (first paint your initial if need be that way it has time to dry). Paint the bottom half of the canvas the color of your choice and let it dry. You may need to apply several coats. While it dries, cover the back of your initial with your Tacky glue and paste it to the center of your circle. Next, tape off your canvas again and paint your stripe. 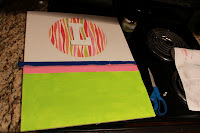

By this time your bottom half should be dry and you're ready to finish it off by adding the name to personalize the painting. I drew it out with a pencil and then went over it with a paint pen. The artist from Spearmint Baby printed a name out online in the type of font she liked best, then traced that on to her canvas and painted it.
 This is the final product! Took me about 20 minutes total to
finish this bad boy and I love how they turn out. They're so easy and the perfect gift for a new baby or a birthday! You could even make an adult version for a housewarming party by changing a few colors out, adding a damask print paper, and painting the last name.
*Note*-The blogger from Spearmint Baby suggested adding ribbon in place of the stripe. She also painted little dots around her circle when she was finished.

 Here's a couple more I made for my nieces Leighton and
Hadley! They were a big hit!
Final verdict: canvas = about $3.50
paint = $0.53 a bottle x's 2
wooden letter = $1.99
glue = $2.73 a bottle
paint pen = about $2.00
scrapbook paper = $0.59 a sheet
painter's tape = $2.85
Even if you had to go out and buy everything, this project would cost you $15 bucks total and you would have plenty of leftover materials to make a couple more. It took less than 30 minutes to make. I'd say this is one of the best Pinterest Projects I've attempted so far, and believe me I've tried lots :) I've got absolutely nothing bad to say about this one. Shocker right!?
Next week we're making frosted wine glasses and I can promise you I'll have plenty to say about that one (insert evil laugh here.) Until then,
XOXOXOXO
The Posh Pinner

Hey Rayna... :-). Love the tute and the project turned out perfectly. Love your style of writing girlie! Welcome to Bloggerville... So glad you took the plunge.
ReplyDeletexo
Spencer